Your cart is currently empty!

Project Overview
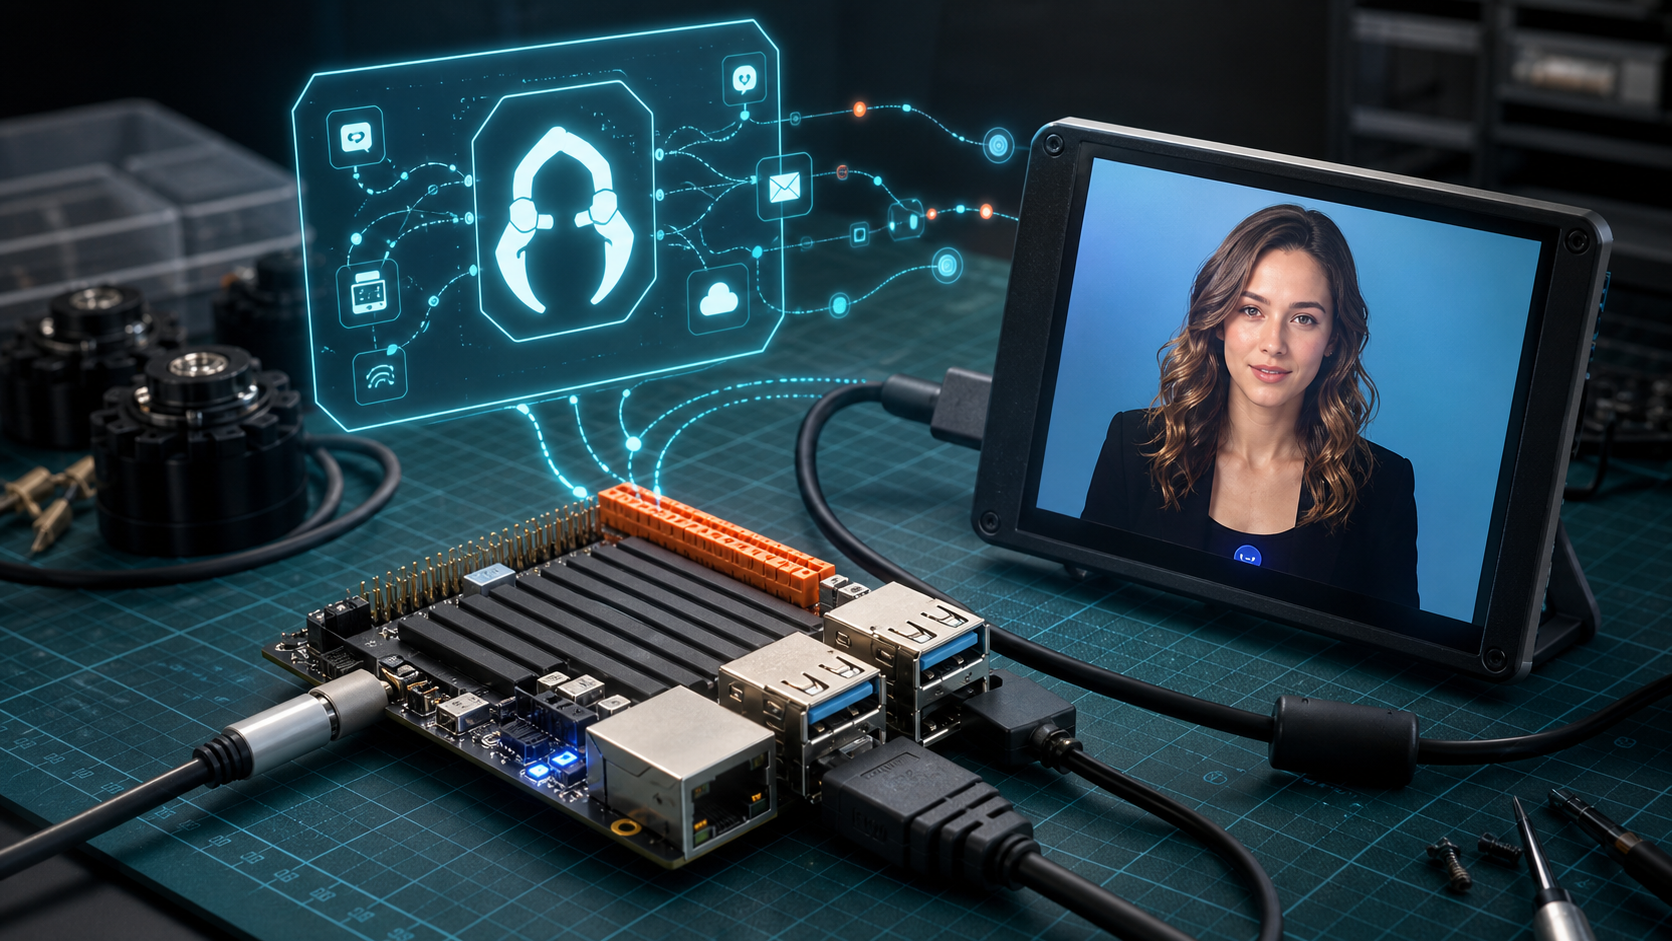
This project is a desktop AI companion prototype. It uses the RDK X5 as the edge computing host, runs the OpenClaw gateway and MQTT bridge locally, and displays the NavTalk digital human interface on a small screen. The user speaks through a USB audio card or microphone. The system converts the voice input into text, sends it to OpenClaw and the large language model for processing, then sends the returned text through TTS and NavTalk lip sync to generate a visual digital human response.
This is not a complete mobile robot chassis project. It is a hardware validation platform designed to first get the voice, display, AI agent, and MQTT communication pipeline working together. The main hardware in this demo is the RDK X5, a small display, and a USB audio capture device.
Core Hardware List
| Module | Role in the Video | Connection / Purpose |
|---|---|---|
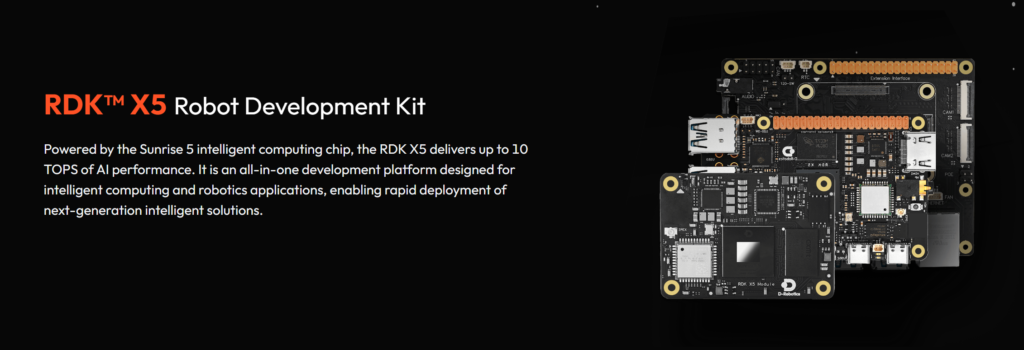
| RDK X5 development board | Edge computing host | Runs the Ubuntu desktop, OpenClaw, and MQTT bridge; connects to the display and audio device |
| Small HDMI display | Digital human display terminal | Connects to the RDK X5 through HDMI and displays the OpenClaw/NavTalk page and digital human avatar |
| Display driver / adapter board | Interface board for the small display | The blue PCB behind the display, connected to HDMI and power/data cables |
| USB audio card / microphone | Voice input | Plugs into a USB port on the RDK X5 and captures the user’s voice |
| USB-C / power cables | Power supply | Power the RDK X5 and display to keep the system stable |
| Network connection | Access to cloud model and MQTT | The RDK X5 needs network access to reach the OpenAI model, NavTalk page, or MQTT broker |
| Debugging computer | Configuration entry point | Accesses the RDK X5 desktop and services through a browser, terminal, or remote connection |
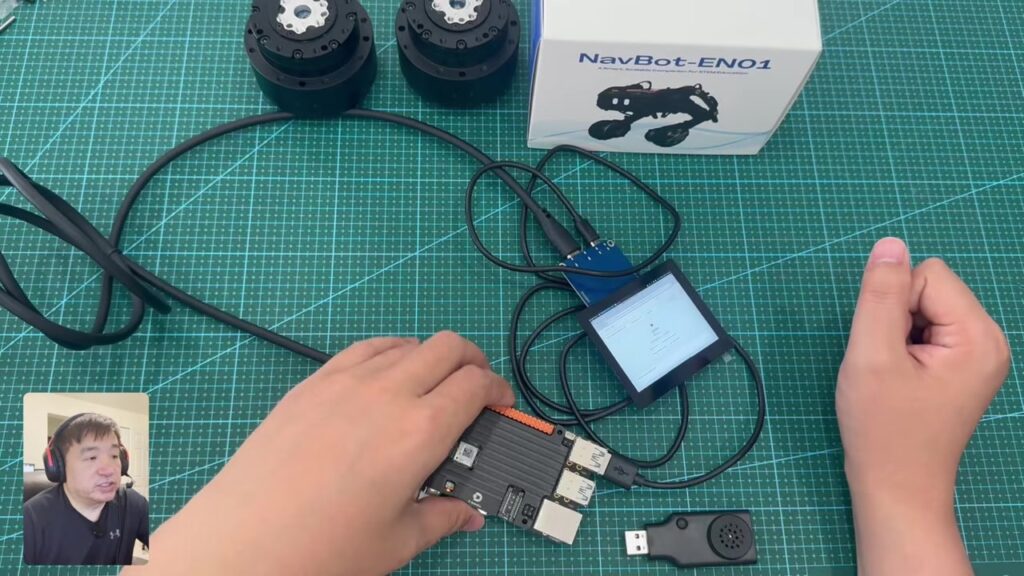
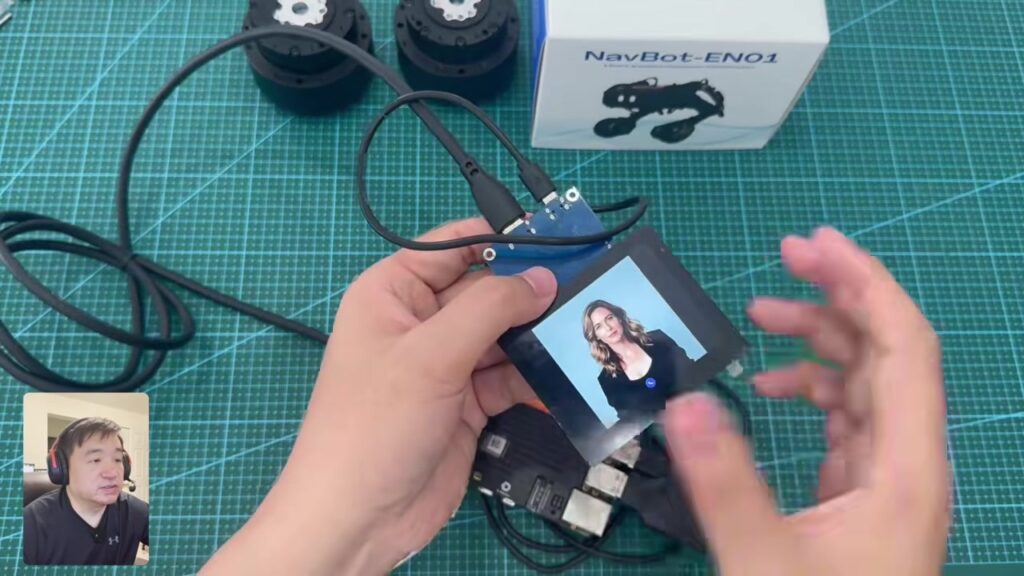
The physical hardware connection is shown in the video screenshot below:
System Architecture
User voiceUSB audio card / microphoneRDK X5Speech-to-text STTMQTT topic: openclaw/inOpenClaw GatewayLLM / OpenAI modelMQTT topic: openclaw/outNavTalkTTS + lip syncDigital human on HDMI display
In this pipeline, the RDK X5 is the hardware hub. It receives USB audio input, drives the HDMI display, and also runs the OpenClaw gateway and MQTT client/bridge environment. MQTT decouples the NavTalk page from the OpenClaw gateway, allowing voice input, AI inference results, and digital human output to move through a lightweight messaging channel.
Step 1: Arrange and Connect the Hardware
At the beginning of the video, the author shows the hardware layout on the desk. The RDK X5 sits in the center of the work mat. The small display is connected to the development board through a thicker HDMI cable, and the blue adapter board behind the screen also has another power/data cable attached. The USB audio device is placed next to the development board and is then plugged into a USB port on the RDK X5.
The recommended build order is:
- Place the RDK X5 in a well-ventilated position and keep it powered off at first.
- Connect the HDMI input of the small display to the HDMI output of the RDK X5.
- Connect power to the small display. If the display requires touch input or extra USB data, connect the corresponding USB cable as well.
- Plug the USB audio card or microphone into a USB port on the RDK X5.
- Power on the RDK X5 and confirm that the system can boot into the desktop normally.
- Connect the network and make sure the RDK X5 can access the model service, MQTT broker, and NavTalk page.
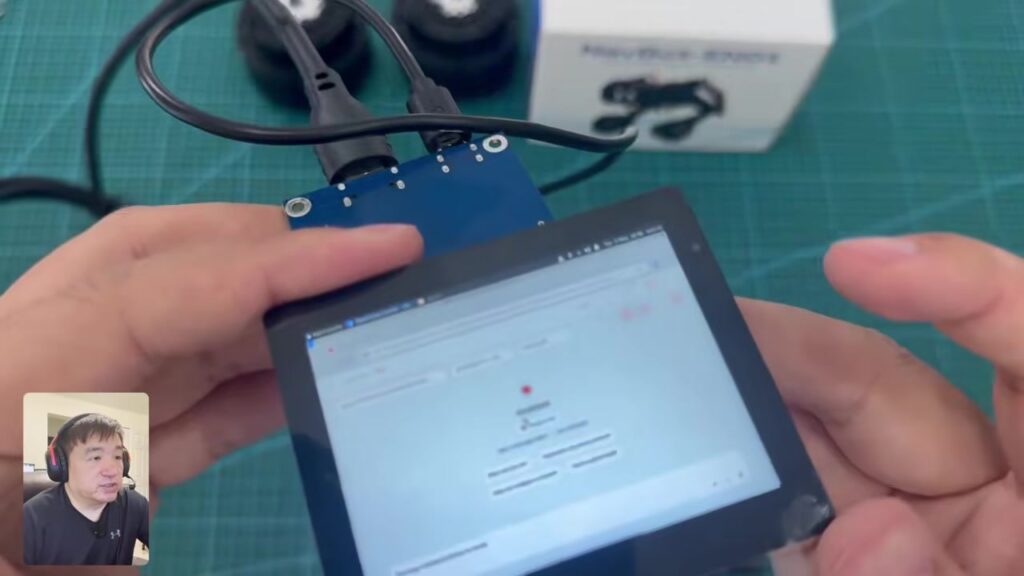
At around the 1-minute mark, the video shows the screen being held closer to the camera. The small display is already showing an OpenClaw/NavTalk-related page:
Step 2: Confirm the RDK X5 Desktop Environment
After the hardware is powered on, the RDK X5 enters an Ubuntu/Xfce-style desktop environment. In the video, the author opens a terminal and browser on the RDK X5 desktop, and all later installation steps are completed directly on the RDK X5.
First confirm three things:
- The HDMI display can show the desktop normally.
- The USB audio card has been recognized by the system and can be used as a recording input.
- The RDK X5 is connected to the network, and the terminal can run
apt update, access installation scripts, and reach the MQTT broker.
If you want to access the OpenClaw console on the RDK X5 from another computer, you also need to check the firewall and listening address later. The author mentions that if another computer on the LAN needs to access the RDK X5, the corresponding ports may need to be opened.
Step 3: Install Basic Dependencies
The on-screen document in the video divides the installation into several phases. The first phase installs basic tools on Ubuntu, including curl, certificates, Git, Python, Python venv/pip, and mosquitto-clients for MQTT testing.
The dependencies shown on screen are similar to:
sudo apt update
sudo apt install -y curl ca-certificates git python3 python3-venv python3-pip mosquitto-clients
These tools are used for:
| Tool | Purpose |
|---|---|
curl | Downloads the OpenClaw installation script |
git | Fetches the MQTT skill or sample code |
python3-venv / pip | Creates a Python virtual environment for the MQTT bridge |
mosquitto-clients | Runs end-to-end MQTT tests with mosquitto_pub and mosquitto_sub |
Step 4: Install OpenClaw on the RDK X5
The second phase in the video installs OpenClaw. The on-screen document shows that the OpenClaw installation script pulls Node.js when needed, so the author does not handle the Node.js version separately.
The installation command shown in the video is:
curl -fsSL https://openclaw.ai/install.sh | bash
After installation, run the configuration wizard:
openclaw configure
The author selects the following settings:
| Configuration Item | Selection in the Video |
|---|---|
| Gateway location | local / this machine |
| Model provider | OpenAI |
| Model | gpt-5.5 |
| Lockdown | Disabled |
After configuration, check the gateway status:
openclaw gateway status
The screen shows that the OpenClaw gateway is running locally, with service port 18789. The Dashboard address is similar to:
http://127.0.0.1:18789/
The Gateway WebSocket address is similar to:
ws://127.0.0.1:18789
The key point in this phase is that OpenClaw is now running as a local service on the RDK X5. The later MQTT bridge and NavTalk setup both communicate around this gateway.
Step 5: Install the MQTT Skill and Bridge Environment
OpenClaw provides the agent/gateway capability, but a messaging channel is needed between the NavTalk page and OpenClaw. In the video, the author places an mqtt-client skill into the OpenClaw workspace and creates a Python runtime environment for it.
The path shown in the on-screen document is approximately:
$HOME/.openclaw/workspace/skills/mqtt-client/
If the code is already on the desktop, it can be copied into the OpenClaw skills directory:
mkdir -p "$HOME/.openclaw/workspace/skills"
cp -a "$HOME/Desktop/mqtt-client" "$HOME/.openclaw/workspace/skills/mqtt-client"
It can also be cloned into the same directory through Git. The video then runs the installation script, installs the MQTT skill and Python venv, and writes the configuration into OpenClaw.
The important part of this step is not just installing packages. It extends OpenClaw from a local chat gateway into a service that can subscribe to MQTT input and publish results back to MQTT output.
Step 6: Configure the MQTT Broker
The video shows two MQTT broker options:
| Option | Use Case | Notes |
|---|---|---|
| Default EMQX public broker | Quick testing | The document shows broker.emqx.io; WebSocket + TLS uses port 8084 |
| Local Mosquitto broker | Local closed-loop setup / more offline-friendly operation | The video shows installing mosquitto and opening TCP 1883 plus WebSocket 9001 |
The default EMQX test commands in the on-screen document are similar to:
mosquitto_sub -h broker.emqx.io -p 1883 -t openclaw/out -v
mosquitto_pub -h broker.emqx.io -p 1883 -t openclaw/in -m "Say hello in one sentence."
If using local Mosquitto, the video shows installing and enabling the service:
sudo apt install -y mosquitto
sudo systemctl enable mosquitto
The script then adds TCP 1883 and WebSocket 9001 listeners. The screen shows the ss -ltnp check result, where 0.0.0.0:1883 and *:9001 are both listening.
Choose the broker based on the scenario:
| Scenario | Recommendation |
|---|---|
| Quickly reproduce the video flow | Start with the EMQX public broker |
| Stable demo within the same LAN | Use local Mosquitto on the RDK X5 |
| Reduce dependency on the public internet | Use local Mosquitto |
| NavTalk page runs on another device | Check the RDK X5 firewall and WebSocket port |
Step 7: Start OpenClaw and the MQTT Bridge
After the MQTT broker is configured, the author restarts the OpenClaw gateway and starts the MQTT bridge.
The verification process has three layers:
- Call the OpenClaw HTTP endpoint and confirm that it returns
HTTP 200. - Start the MQTT bridge and check that the terminal shows logs such as configuration loaded, MQTT connected, and topic subscription succeeded.
- Open another terminal, publish a message to
openclaw/inwithmosquitto_pub, and usemosquitto_subto observe whetheropenclaw/outreceives a reply.
The first test in the video has a small issue, but the author retries and the message pipeline works. This also shows that the most common MQTT debugging problem is usually not the model itself, but the broker address, port, topic, or publishing and subscribing against different brokers.
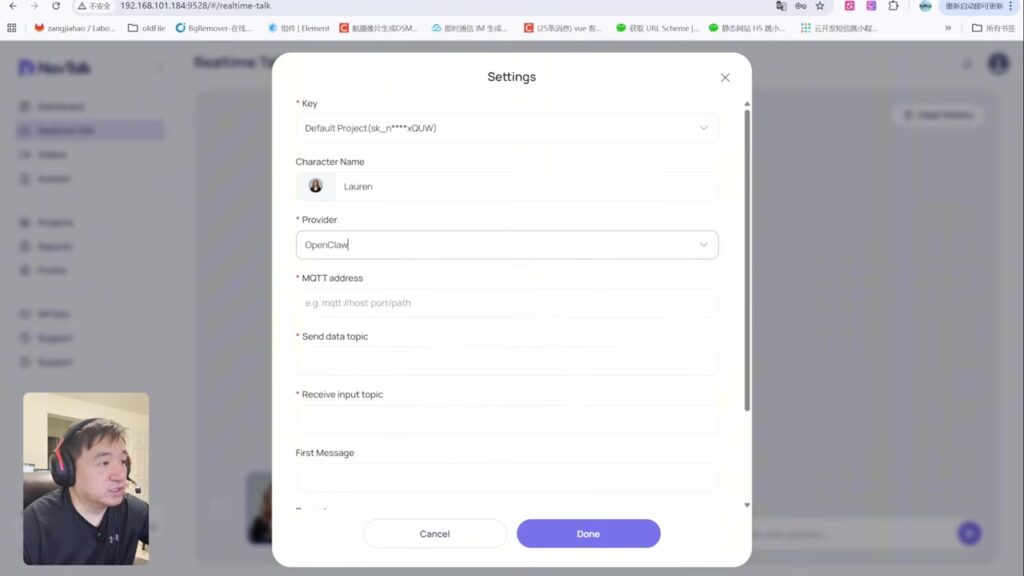
Step 8: Configure the NavTalk Digital Human Page
After OpenClaw and MQTT are ready, the author opens the NavTalk page and enters the avatar settings page. The visible configuration items in the video include:
| NavTalk Configuration Item | Role in the Video |
|---|---|
| Provider | Select OpenClaw |
| MQTT address | Enter the MQTT endpoint |
| Send data topic | Topic used by NavTalk to send text to OpenClaw |
| Receive input topic | Topic used by NavTalk to receive replies from OpenClaw |
| Character Name | Select a digital human character, such as Lauren |
Configuration page screenshot:
The logic is: NavTalk does not call the large model directly. Instead, it sends the speech-recognized text to MQTT. The OpenClaw bridge subscribes to that input topic, processes the request, and publishes the reply back to an output topic. NavTalk receives the text, then handles TTS and digital human lip sync.
Step 9: End-to-End Test
At the end of the video, the author performs a full demo. He says “Please tell me a story” to the USB audio device. The system completes the following steps:
- The USB audio card captures the voice.
- The speech module on the RDK X5 converts the voice into text.
- The text is sent to OpenClaw through MQTT.
- OpenClaw calls the configured OpenAI model to generate a reply.
- The reply text is sent back to NavTalk through MQTT.
- NavTalk generates speech and drives the digital human lip sync.
- The small display shows the digital human telling a story.
The final screen shows the NavTalk digital human. The RDK X5, small display, and audio input device form a complete desktop AI companion:
Key Hardware Notes
1. Do not connect only HDMI to the small display
Many small HDMI displays require separate power in addition to the HDMI signal cable. Some displays also need an extra USB data cable if touch input is supported. In the video, the display has a blue adapter board and multiple cables behind it, which means it is not a module that can fully work with HDMI alone.
2. The USB audio device must be recognized by the system
Voice is the main interaction entry point for this project. If the USB audio card is not recognized by the RDK X5, the later STT, MQTT, and OpenClaw stages will not receive valid input. After connecting the hardware, first confirm the input device in the system audio settings, then run the end-to-end test.
3. The MQTT address must be reachable from NavTalk
If the NavTalk page and the RDK X5 are not running in the same environment, for example if NavTalk is opened in a browser on another computer, then 127.0.0.1 points to the browser computer itself, not the RDK X5. In that case, set the MQTT endpoint to the LAN IP address of the RDK X5 and check the firewall.
4. Topics must be configured in pairs
The send topic in NavTalk must match the topic subscribed to by the OpenClaw bridge. The receive topic in NavTalk must match the topic published by the OpenClaw bridge. The video document uses names similar to openclaw/in and openclaw/out, so it is best not to rename them at the beginning.
5. Verify with the command line before connecting NavTalk
In the video, the author first verifies MQTT input and output with mosquitto_pub and mosquitto_sub, then connects NavTalk. This step is important because it narrows the problem scope. If the command line cannot receive a reply, check OpenClaw/MQTT first. If the command line works but NavTalk does not, then check the NavTalk endpoint, topics, and browser permissions.
Final Result
After completion, this hardware platform provides the following capabilities:
| Capability | Implementation |
|---|---|
| Voice input | Captures user voice through the USB audio card |
| AI inference | OpenClaw on the RDK X5 calls the large model |
| Lightweight communication | MQTT bridge forwards input and output |
| Digital human display | NavTalk displays the avatar on the HDMI screen |
| Voice reply | TTS generates speech, and NavTalk performs lip sync |
The most valuable part of the project is that it turns the RDK X5 from a development board into an interactive desktop AI terminal. The hardware layer uses only a few external devices, but the combination of OpenClaw, MQTT, and NavTalk creates a complete loop of listening, thinking, speaking, and displaying.
Reproduction Suggestions
If reproducing the project from scratch, follow this order:
- First boot the RDK X5 normally and connect it to the network.
- Connect the HDMI display and confirm that the display is stable.
- Connect the USB audio card and confirm that recording input works.
- Install OpenClaw and make sure
gateway statusis normal. - Install the MQTT skill and bridge.
- Start with the EMQX public broker for a quick test.
- If a local setup is needed, switch to a local Mosquitto broker.
- Configure the NavTalk Provider, MQTT endpoint, and topics.
- Run an end-to-end test with one simple voice prompt.
The benefit of this build order is that every step has a verifiable result. It avoids mixing display, audio, network, MQTT, model configuration, and digital human page issues into one debugging session.
Related Links
- Video: Build an AI Companion on RDK X5 with OpenClaw, NavTalk and MQTT
- Author channel: AI Researcher & Robotics Developer Frank Fu
- RDK Challenge application form: https://forms.gle/ojG5pRmWXMsM27Vb9
- RDK Challenge GitHub: https://github.com/D-Robotics/Robotics-Dream-Keeper-Challenge
- RDK Challenge Discord: https://discord.gg/ydVxBpz3vP
Appendix
- Video Source: https://www.youtube.com/watch?v=u07fDrbOdYI, or watch it right here.


Leave a Reply